Toilet Repairs

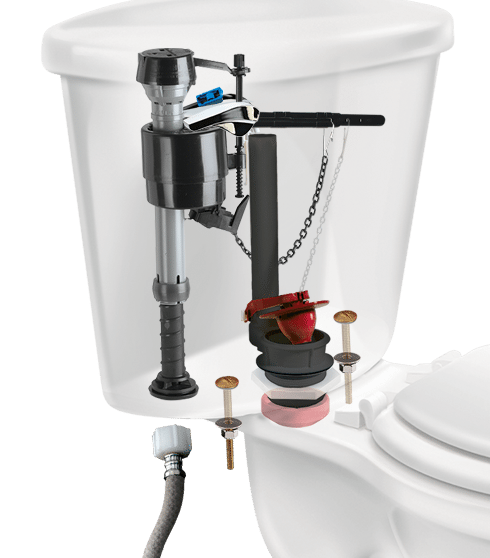
Toilets are an essential part of our daily lives, and When they break down, they can be a significant inconvenience. Fortunately, many toilet problems can be fixed with some know-how and essential tools. This article will provide a step-by-step guide to toilet repair with pictures to help you troubleshoot and fix common toilet problems.
Tools You Will Need:
– Adjustable wrench
– Screwdriver
– Plunger
– Toilet auger
– Replacement parts (if necessary)
Step 1: Identify the Problem
The first step in toilet repair is to identify the problem. Common toilet problems include clogs, leaks, and running water. If your toilet is clogged, you may notice that the water level in the bowl is high and the water is slow to drain. If your toilet leaks, you may see water on the floor around the toilet’s base. The toilet is running all the time.
Step 2: Turn Off the Water Supply
Turn off the water supply. The water supply valve is usually behind the bathroom near the floor. Turn the valve clockwise to shut off the water supply.
Step 3: Plunge the Toilet
If your toilet is clogged, the first step is to try plunging it. Place the plunger over the drain in the toilet bowl and push down firmly. Pull up quickly to create suction and repeat til the clog is clear.
Step 4: Use a Toilet Auger
If plunging does not clear the clog, you may need to use a toilet auger. Please insert it into the toilet bowl and turn the handle clockwise to feed into the drain. Continue turning the handle til the clog is clear.
Step 5: Check for Leaks
If your toilet leaks, the first step is to check the wax ring seal between the toilet and the floor. Next, remove the toilet by disconnecting the water supply and unscrewing the bolts holding it to the floor. Next, lift the toilet off the floor and check the wax ring for damage. Replace the wax ring if necessary.
Step 6: Replace Parts
If your toilet is running, you may need to replace the flapper or fill valve. The flapper is the rubber seal that covers the drain at the bottom of the tank. If the flapper is worn or damaged, it may not seal properly, causing the toilet to run. The fill valve is the mechanism that fills the tank with water after each flush. If the fill valve is faulty, it may not shut off properly, causing the toilet to run.
To replace the flapper:
- Turn off the water supply and flush the toilet to drain the tank.
- Remove the old flapper and replace it with a new one.
- Turn off the water supply and remove the old valve to replace the fill valve.
- Install the new valve according to the manufacturer’s instructions.
Step 7: Reinstall the Toilet
Do the necessary repairs; it is time to reinstall the toilet. Place the wax ring on the flange on the floor and lower the toilet onto the ring. Tighten the bolts that hold the toilet to the floor and reconnect the water supply. Please turn on the water supply and flush it to check for leaks.
Toilet repair is a simple process easy to sort with a few essential tools and some know-how. With these steps, you can troubleshoot and fix common toilet problems quickly and easily. If you need clarification on any aspect of toilet repair, it is always best to consult a professional plumber from SM Heating and Plumbing Services at 01412660100.
